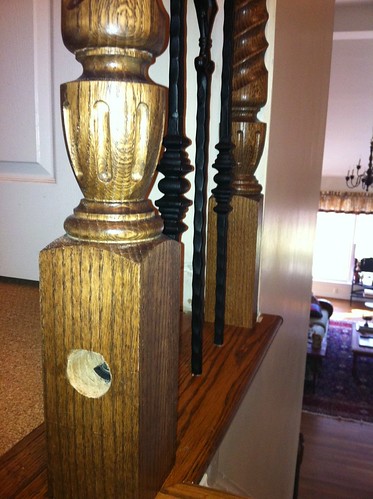
I used the sure tite newel fastner on this stair newel for the stair remodel in Riverton Midlothian Virginia. Normally believe it or not in most new homes trim crews just use a double ended lag bolt one ends screws into the newel post and the other goes into the landing tread. But with the sure tite newel fastner you get to tighten the newel post securely to the floor and it will not come loose, the hole is covered up with a plug.

Finish Carpenter in Richmond,Virginia. Don't hire a home improvement company,Handyman or a General Contractor to install your wood trim and crown molding or iron balusters hire a Finish Carpenter hire The Finishing Company. We also install crown molding, chair railing, wainscoting,shadow boxes, wrought iron balusters, stair treads and risers (stair remodeling).
Wednesday, December 14, 2011
Staircaser remodel in Richmond Va
Quick slideshow slash video made in youtube of a job we recently completed in Midlothian Virginia at the Riverton subdivison off Robious Rd. Please visit us on the web http://www.thefinishingcompany.net/ Stair treads completely replaced with solid oak, all new newel posts and handrail. Also installed shadow box wainscoting and new wrought iron balusters. We are stair contractors in Richmond Va.
http://youtu.be/_12ZM-q6tIE?hd=1Thursday, November 24, 2011
Iron baluster installation Founders Bridge Midlothian Va. The Brazukas Job.
I received a call from the Brazukas family in the prestigious Founders Bridge Subdivision in Midlothian Virginia. Mr. Brazukas intially just wanted a quote over the phone for the iron baluster installation but I make a policy of never giving estimates over the phone because I have learned from experience that I rarely land the job without first meeting with customer to discuss their needs and present them with samples of our iron balusters, a full color catalog so they know exactly what they are getting and exactly what the job entails.
I met with the Brazukas family and they immediately took a liking to the Basket and Twist Iron baluster series in oil rubbed copper, a popular choice. Mrs Brazukas came up with her own iron baluster design for the staircase using the stair tool and even had it printed out for me before I started the job.
I met with the Brazukas family and they immediately took a liking to the Basket and Twist Iron baluster series in oil rubbed copper, a popular choice. Mrs Brazukas came up with her own iron baluster design for the staircase using the stair tool and even had it printed out for me before I started the job.
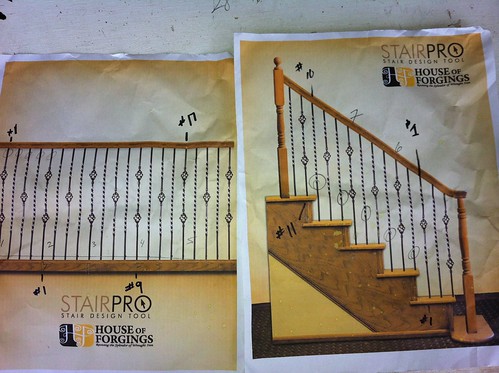 | |||||
| Iron baluster design made by homeowner. |
Now that the Brazukas family had reached a decision on their pattern and type of Iron balusters I placed an order with my supplier. The order arrived three days later and in pristine condition that's what I like most about my supplier I always get the iron balusters within 3-4 days and they always come in perfect condition. I've tried most iron baluster manufacturers and the House of Forgings seem to be the best for selection, quality, price and shipping ( the iron balusters are packed very well for transport).
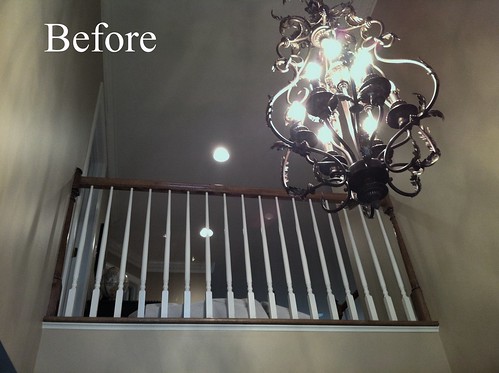
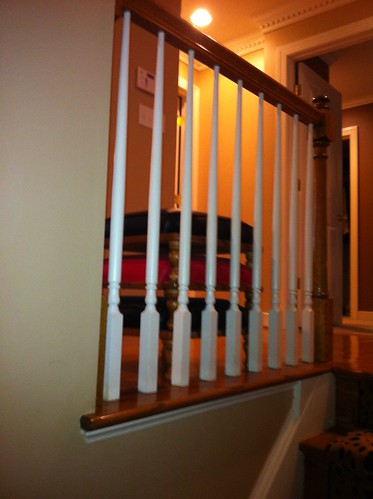
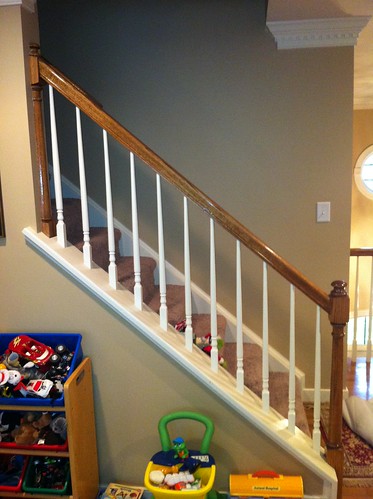
I organized an installation date with Mrs.Brazukas she was eager to get her iron balusters installed before Thanksgiving and I was more than happy to accommodate this. I began by moving rugs and tables and other items away from stairs and and then I took my usual round of before photographs before I removed the wooden balusters.

Mrs. Brazukas was soon very pleased to find out that the removal of the wooden balusters on the staircase was much less hassle and a lot cleaner than she had anticipated. I removed the wooden balusters using a reciprocating saw by cutting them at their thinnest part and then breaking them and easing them out of the stair railing and stair treads creating a minimum amount of dust that can be cleaned up in no time at all. I then removed all of the remaining pieces of wood baluster, brad nails. I then checked all of the holes to make sure they were at the correct depth if they were not I drilled and filled as needed cleaning up as I go along, customers love when I produce my shop vac :)
The Brazukas had four separate runs of stair rail, one on the first floor leading to the second floor landing where there was had three sections one small run at the top of the stairs, another leading to the third floor and one longer run overlooking to the foyer.
The balusters on the knee wall leading to the third floor require a little more work to install as do the balusters on the open staircases in comparison to straight runs of stair rail.
About the install,I cut all of the iron balusters to length using a portable band saw it's basically an electrical hacksaw and it makes light work of cutting these solid pieces or wrought iron. Power tools definitely make the job of installing wrought iron balusters easier but any work involving stairs in general means a degree of complexity and hard work. I dry fit everything before attaching the iron balusters using a two part epoxy that is mixed in a tube and dispenser. This epoxy hardens to an opaque white color in about 15 minutes. I attach the balusters in sections and come back and remove most of the excess epoxy, although if you look you will still notice some as your eye is drawn to these areas during the installation but this is a necessary evil if you will. I guarantee if fresh eyes were to gaze upon the finished install they will not notice it!
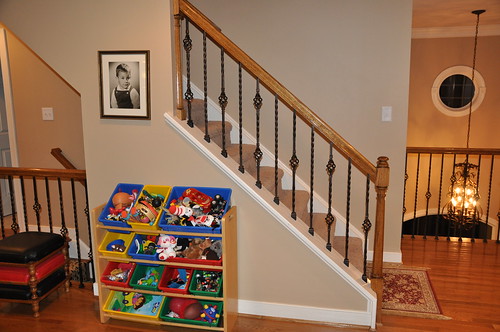
The Brazukas Family are extremely please with the new look of their staircase. Their stair railing is stronger and more beautiful than before. Mrs Brazukas daughter has described it as a whole new house because of the new iron balusters and Mrs.Brazukas said it was really a Christmas gift.
I was glad to get the work and thank the Brazukas family for it.Our estimates are free please call Brian (804)591-9869 Today!
You can see all of the iron baluster images on my flickr account iron balusters
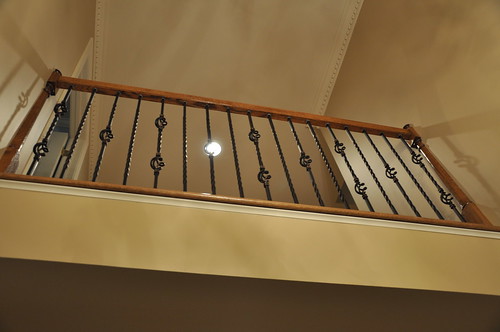
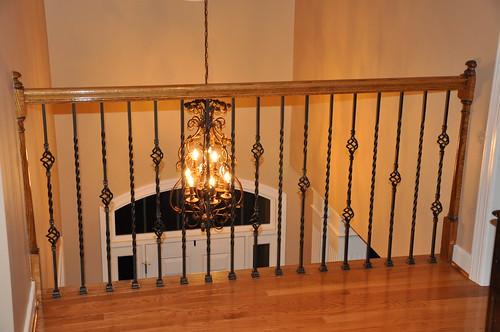 |
| Finished iron balusters on balcony. |
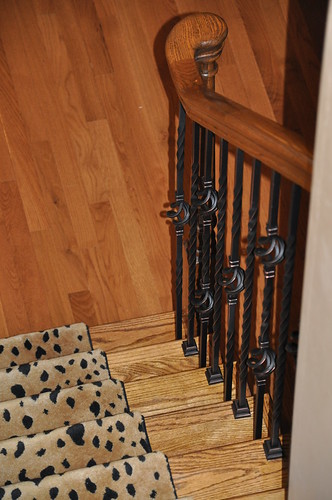
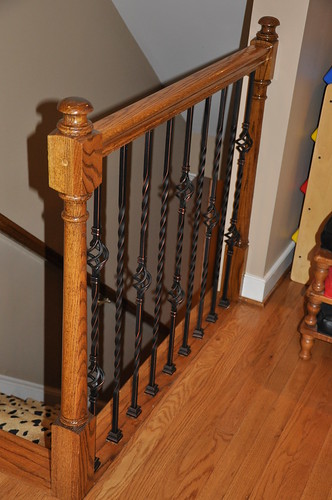 |
| Wrought iron balusters on small stairs. |
Tuesday, June 28, 2011
House of Forgings Iron balusters
Installing some beautiful wrought iron balusters in Old world copper over the next couple of days. The homeowner has chosen a single twist baluster with a straight bar type baluster alternating with a fancy scroll type baluster strategically thrown in here and there.We supply balusters from the House of Forgings.The Finishing Company can help you order and install your wrought iron balusters.If you are doing do-it-yourself iron balusters we can walk you through your iron balusters installation.Call (804)591-9869 or email us brian@thefinishingcompany.net
Okay just finished this wrought iron baluster job beside a couple of minor things. Here's the before picture:
 And the after picture:
 |
| We can supply and install wrought iron balusters! |
 And the after picture:
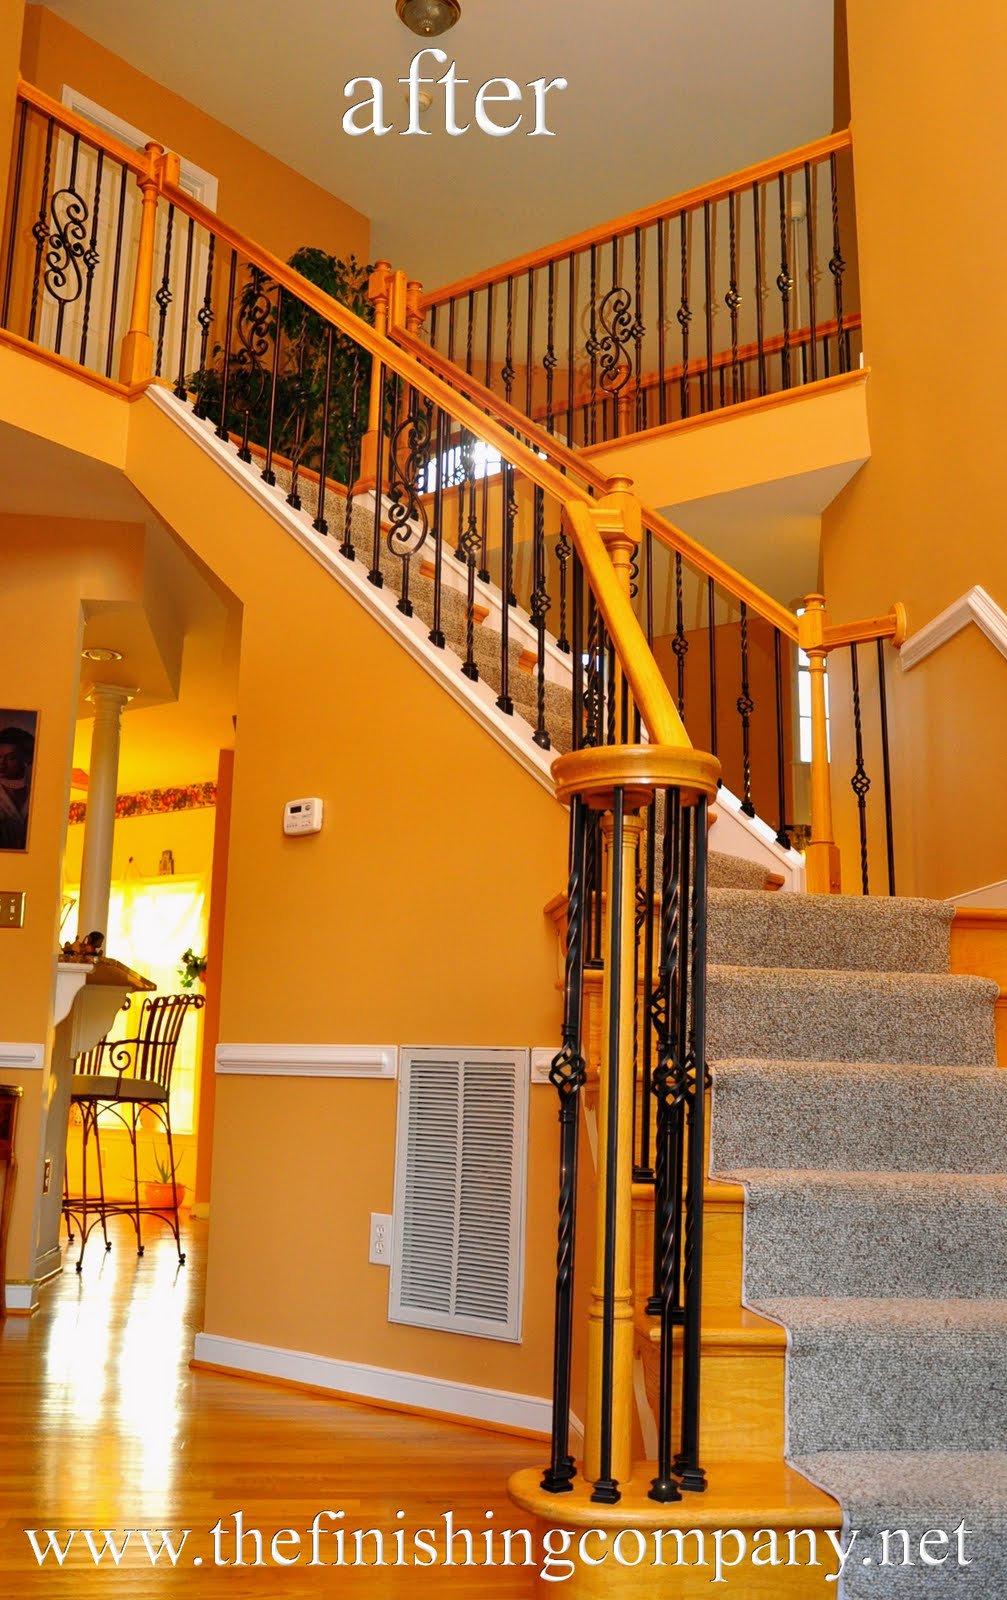
Saturday, June 18, 2011
Hollow black copper iron baluster
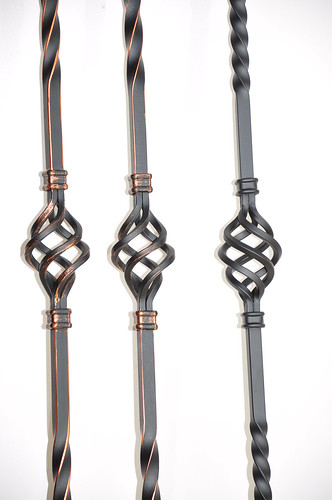
These are the iron balusters in the basket series. From left to right, black copper hollow type, black copper solid type, solid satin black.
The hollow types are light weight but strong and the finish is pretty much the same. So the shipping is a little cheaper and the cost of the balusters is less expensive. So now more finishes are available for less. Call The Finishing Company for your iron baluster installs.
(804)591-9860 in Richnmond Va
Wednesday, June 8, 2011
Two piece crown molding
Just installed some larger crown molding in a new home in Richmond Va. I installed about 400 Linear feet of a two piece or member colonial type crown molding. It consisted of a 4 1/4 inch beaded base board and then the crown moulding 4 5/8 inches.
First I secured the beaded base board upside down to the studs, then the 4 5/8 crown molding to the studs and the base board and I also toe nailed into the ceiling with some smaller nails. There are lots of different types of moldings and millwork you can combine to make built up crown. There were many corners a good angle finder comes in handy.
Here is a before picture
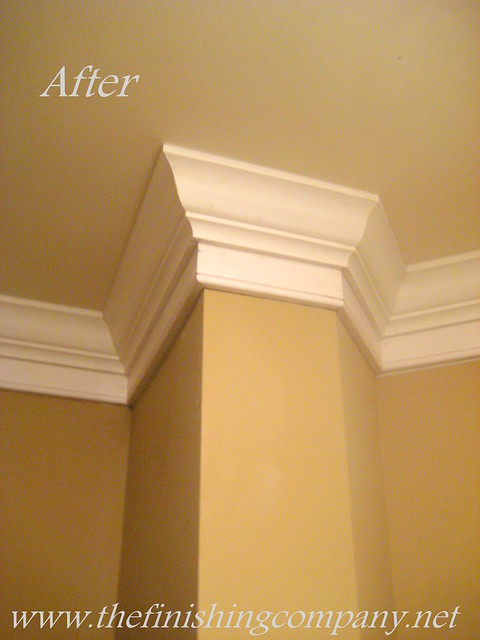
And an after picture
First I secured the beaded base board upside down to the studs, then the 4 5/8 crown molding to the studs and the base board and I also toe nailed into the ceiling with some smaller nails. There are lots of different types of moldings and millwork you can combine to make built up crown. There were many corners a good angle finder comes in handy.
Here is a before picture
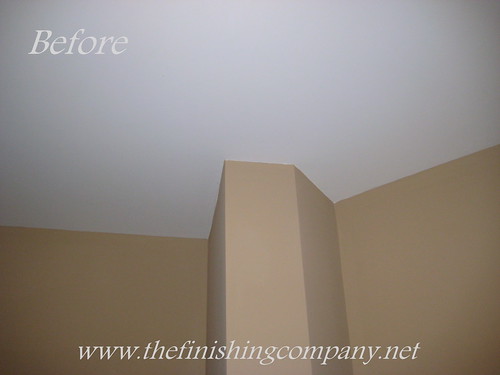 | |
| Two member crown molding before |
 Crown Molding |
| Two member crown molding after. |
Thursday, May 19, 2011
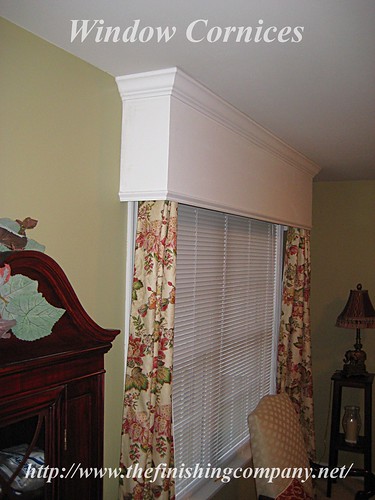
window-cornices-and-treatments-richmond-virginia
We installed this window cornice in Richmond Va. Beside adding architectural detail to a room I think these cornices help prevent dust gathering on these home made curtains? Anyhow if you have a picture or a design of a window cornices you would like us to make please call The Finishing Company in Richmond Va (804)591-9869 Finish Carpenters.
I think you could call this a valance or a window treatment?
http://www.thefinishingcompany.net/
I think you could call this a valance or a window treatment?
http://www.thefinishingcompany.net/
Wednesday, February 23, 2011
Fireplace mantel makeover by Finish Carpenters in Richmond Va.

I just installed this mantel in Richmond Va. It used to be a dull boring brick fireplace mantel. It completely changed how people saw and felt in the room. A fireplace mantel along with stairs are focal points in your home. The mantle is
 made of yellow pine and mdf with some decorative panel molding, cabinet molding, crown molding, base board and fluted molding. If you need a carpenter in Richmond Va please call us for free no obligation custom made mantel!
If you would like to see more images of this fireplace mantel please see brick fireplace mantel makeover
Tuesday, January 4, 2011
bookcases richmond va
 |
| Bookcases Richmond VA. |
The fluted molding was made of pine and was revisable so I thought the beaded side out would go better with molding in the house.

My website
Subscribe to:
Posts (Atom)